
Beating the Terminids comes down to three habits: kill the small bugs that call breaches before they can scream, close bug holes with explosives instead of fighting what crawls out of them, and keep anti-tank firepower ready for Chargers, Bile Titans and Impalers. This Terminid guide covers the weak points of the bugs you will meet, the four mutated strains that change how a planet plays, and the Hive Lord, the giant burrowing worm that roams some worlds on Suicide Mission and above. Read the planet's modifiers before you drop, because a Rupture or Caustic strain world needs a different kit from a standard one.
We checked unit stats against the community Helldivers Wiki's Terminid pages and the timeline against Arrowhead's patch notes and developer posts on Steam, including the September 2026 Hive Lord feature and the October 20, 2026 patch, in November 2026.
How the Bugs Fight and Why Breaches Snowball
Terminids win by numbers. Most of them attack in melee or with acid bile, which deals damage over time and slows you, while the airborne Dragonroach uses fire instead. The real danger is escalation: Scavengers scream to draw nearby bugs, and Warriors and Brood Commanders can call in a bug breach even after losing their heads, so a patrol you ignore can turn into an endless wave.
Nests work the same way. Every bug hole keeps spawning Terminids until it is destroyed, and holes have no normal hitbox, so bullets do nothing to them. You need demolition force: an explosive with at least 20 demolition force landing inside the hole (any explosive grenade, a Grenade Launcher round, an Eruptor or Autocannon shell, a Recoilless Rifle rocket) or at least 40 demolition force from outside, which many Eagle and orbital strikes and the Spear provide. A nest only counts as destroyed when every hole is closed.
Two quieter rules help with routing. Destroying half of the nests on a map increases patrol spawns, so do not clear every nest on autopilot if the objective is elsewhere. And Spore Spewers and Shrieker Nests only have an armor value of 2, so any weapon can eventually destroy them, although strikes like the Orbital Precision Strike or a Recoilless Rifle rocket are far faster.
Small and Medium Bugs: Who to Shoot First
- Scavenger (60 health): weak and slow, but its scream attracts breaches. A single melee hit to the head kills one and saves ammo.
- Pouncer (60 health) and Hunter (130 to 160 health): leapers that close distance fast. Hunters die within seconds once ignited, so laser weapons like the LAS-5 Scythe can sweep a pack; shooting their legs or wings stops the pounce.
- Warrior (250 to 325 health): headshots work but trigger a berserk state, so take a leg too or step back while it bleeds out.
- Hive Guard (500 health): medium armor on its front, head and legs, and it crouches when shot. Use medium-penetration weapons, flank it, or set it on fire.
- Brood Commander (800 health) and Alpha Commander (1,000 health, difficulty 8 and up): leaders that summon extra Warriors. Their unarmored legs are the weak point, and destroying both of an Alpha Commander's claws kills it.
- Nursing Spewer and Bile Spewer (750 health each): shoot the head. On difficulty 6 and higher the Bile Spewer's head needs medium penetration, but its mouth is unarmored, and a grenade placed under a Nursing Spewer often kills it outright.
The order matters more than the weapon: Scavengers and anything about to call a breach first, then Hunters and Pouncers that can pin you down, then the slower Warriors. Our older primary weapon guide covers which rifles and shotguns handle this mix best.
Chargers, Bile Titans and Impalers
The Charger is usually the first heavy bug new players learn to fear. Dodge by moving or diving perpendicular to its run, or diagonally toward it, and not too early, because it can turn tightly. An anti-tank shot to the head from an EAT-17, Recoilless Rifle or Quasar Cannon kills it outright, and a Spear or Recoilless hit to the torso cracks the armor. Shooting a leg strips its armor and exposes flesh that takes 300 percent damage to main health, so even a primary can finish it. A G-123 Thermite stuck to the head or torso also kills a standard Charger.

Watch for the variants. The Charger Behemoth (3,000 health) still dies to one Spear hit to the torso, but other anti-tank weapons need a headshot and a Thermite has to stick to its head for an instant kill; it can replace regular Chargers from difficulty 7. The Spore Charger trails a thick fog and explodes on death unless it bleeds out, and the Orbital Railcannon Strike and Eagle 110mm Rocket Pods will target it through the fog. The Rupture Charger tunnels underground and surfaces within about three meters of its target, with heavier armor on its head and front legs.
The Bile Titan is a walking artillery piece with heavy armor. The Orbital Railcannon Strike, Orbital Precision Strike, Eagle 110mm Rocket Pods and Eagle 500kg Bomb can each kill one in a single use if they land well, the MS-11 Solo Silo and EAT-411 Leveller kill it with a hit anywhere, and the Recoilless Rifle and EAT-17 need a headshot. It is immune to stuns but not to gas damage, destroying its bile sacs stops its spew attacks, and its falling corpse can crush you.
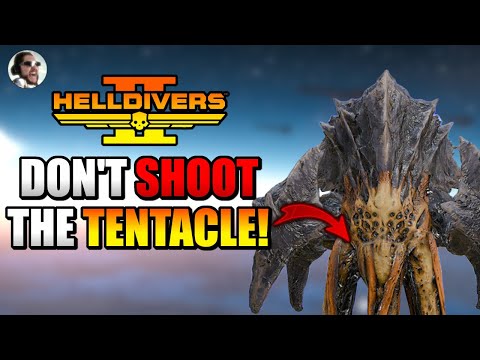
The Impaler burrows its three bladed tentacles to strike from below, which exposes its unarmored head; that is the moment to hit it with a Recoilless Rifle, Autocannon or an Eagle strike. Damaging a tentacle forces it to retract, fire is good at that, and stripping a leg's armor is the fallback if the head never shows. Impalers are especially dangerous to FRVs and exosuits, as our vehicles guide explains.
Stalkers, Shriekers and Dragonroaches
Stalkers (800 health) camouflage themselves almost to invisibility, knock you over with their tongues and only spawn from Stalker Lairs, which appear from difficulty 4. If you see one, find and destroy the lair by following where they come from and looking for the orange glow of its holes. The lair's holes need explosive demolition force of 20 inside, 30 inside for non-explosive damage, or 40 from outside, and one well-placed TED-63 Dynamite can close two. Fire, gas or bile on a Stalker reveals it, and it takes 25 percent extra fire damage. Clearing a lair also earns the hidden "Stalking is illegal" trophy, one of several covered in our trophy guide.
Shriekers are small flying bugs that dive at you in groups from Shrieker Nests, which start spawning them when a detected Helldiver comes within roughly 130 meters. Laser weapons and Autocannon flak rounds bring them down well, going prone makes you harder to hit, and the safest way to kill a nest is from outside that range with a Spear, Recoilless Rifle or Autocannon.
The Dragonroach (6,500 health, difficulty 5 and up) is a flying, fire-breathing heavy. It always follows the same pattern: it spots a target and screeches, circles, dives for a strafing breath attack, then hovers for a final tracking burst, which is the easiest moment to hit it. It staggers easily under sustained explosive fire, a Ballistic Shield blocks its flames, and fire-resistant armor passives reduce its damage. It never spawns from bug breaches, and outside the Spore Burst strain, planets with Dragonroaches do not spawn Bile Titans; a Charger takes the Titan's place instead.
The Four Strains and the Hive Lord
Some planets carry a mutated strain, shown on the galactic map, that reshapes the enemy list:
- Predator Strain: faster Predator Hunters and Predator Stalkers. Stick together, use high-stagger weapons, and use gas or napalm to reveal cloaked Hunters.
- Spore Burst Strain: much faster bugs in bigger patrols that appear about twice as often, which burst on death and leave spores that speed up other bugs.
- Rupture Strain: burrowing Warriors, Spewers and Chargers; the Warriors and Spewers carry medium armor even on their heads. Explosions force burrowers to the surface, so grenade launchers and impact grenades shine.
- Caustic Strain: Bile Spitters, Bile Warriors, Bile Spewers and Spore Chargers that splash acid when they die, plus long-range bile mortars. Since the October 20, 2026 patch this strain is controlled by Arrowhead's Game Masters and shows its own indicator, like the other strains.
The Hive Lord is a colossal worm with 150,000 health, by far the largest pool in the game, that can appear on missions of difficulty 7 and higher on planets that feature it, once per mission. Arrowhead's design director described it in September 2026 as a force of nature you can choose to fight or avoid; it hunts by disturbance, so explosions, barrages and bug breaches draw it in. To kill it, break its armor plates with sustained anti-tank fire, then pour damage into the exposed flesh, which is immune to explosions. The wiki rates the Eagle Strafing Run, Orbital Gatling Barrage, EXO-45 Patriot and TD-220 Bastion as especially effective, and since the October 20 patch it leaves combat sooner if nobody damages it. Hive Worlds, added in September 2025, add randomly generated cave systems on top: bring a flashlight, and call stratagems through the holes in the cave roof.
A Loadout That Handles the Swarm
A reliable bug kit has one anti-tank answer, one crowd answer and a primary that can hurt medium armor. The Recoilless Rifle, Quasar Cannon, EAT-17 or Spear covers Chargers and Titans; the Orbital Gatling Barrage, Eagle Airstrike or a sentry handles breaches; and a medium-penetration primary deals with Hive Guards and Spewers, as our loadout guide explains. Carry explosive grenades for holes, and add an Eagle 500kg Bomb or Railcannon for Bile Titans.
Muscle Enhancement is the bug-front booster to know: it reduces the slow from acid attacks, bile deaths and bug mines as well as from mud and snow. Our booster rankings compare it with Stamina Enhancement and the rest, and the Illuminate guide explains why the same loadout struggles against the squids.
Skip Ahead to the Big Bugs
The toughest bug planets are also where the super samples and best rewards live, and getting a squad ready for difficulty 7 and up takes a lot of leveling and farming. The store's Helldivers 2 boosting hub lists max sample runs, level boosting and higher-difficulty unlocks such as T9 where listed, for PC and PlayStation accounts. Check the specific listing for its platform options, delivery details and current availability.
Frequently Asked Questions
Where is a Charger's weak spot?
Its head, for anti-tank weapons, which kill it in one shot. With smaller guns, shoot the armor off a leg and then hit the exposed flesh, which takes triple damage.
What is the fastest way to kill a Bile Titan?
A well-placed Orbital Railcannon Strike, Orbital Precision Strike, Eagle 500kg Bomb or Eagle 110mm Rocket Pods can each do it in one use. A Recoilless Rifle or EAT-17 needs a headshot.
How do you close bug holes?
Drop an explosive inside: a grenade, a Grenade Launcher round or an Autocannon or Eruptor shell works. Many Eagle and orbital strikes, such as the 500kg Bomb and Orbital Laser, can also destroy holes from outside.
Can you actually kill the Hive Lord?
Yes, but it has 150,000 health. Strip its armor plates with anti-tank weapons, then focus non-explosive damage on the exposed flesh. Strafing Runs, Gatling Barrages, the Patriot exosuit and the Bastion tank work best.
Why do bug breaches keep happening?
Scavengers, Warriors and Commanders are calling them. Kill those first, or avoid patrols entirely, and remember that Warriors can still call one after losing their head.
What are Terminid strains?
Mutated subfactions listed on a planet: Predator, Spore Burst, Rupture and Caustic. Each changes which bugs spawn and how they behave, so check the planet before choosing your loadout.