
The strongest Helldivers 2 players rarely have the single most powerful weapon equipped. What they have instead is a loadout where every piece covers for the others, so no threat leaves them without an answer. Building a loadout is less about collecting the best individual items and more about assembling a system: primary, secondary, grenade, armor, and four stratagems, chosen so that together they handle crowds, armor, range, and survival. Get that balance right and the game opens up.
This guide was checked in October 2026 against the in-game loadout screen, the Helldivers community wiki, and discussion on the r/Helldivers subreddit. Arrowhead rebalances weapons, stratagems, and armor often, so the principles below matter more than any specific item name, and you should verify current performance in-game.
Think in roles, not items
The foundation of loadout building is to stop asking "what are the best items" and start asking "what jobs does my kit need to do." Across a mission you face four recurring problems: swarms of light enemies, heavily armored elites, threats at range, and your own survival over a long run. A good loadout assigns each of those jobs to something in your kit, so that whatever a mission throws at you, you have a tool for it.

When you build this way, the individual choices fall into place. If your support weapon handles armor, your primary is free to specialize in crowds. If your stratagems cover crowds, your primary can be a precise anti-elite tool. The pieces constrain and support each other, and the goal is coverage across the whole kit rather than four items that all do the same thing. This role-first mindset is what separates a loadout that feels complete from one that leaves awkward gaps.
The four jobs are also not equal in every mission, which is why a single "best" loadout does not exist. A defense objective weights survival and crowd control heavily; a long sample-hunting operation weights sustain and mobility; a heavy-elite-dense front weights anti-armor above all else. The role-first approach handles this gracefully, because once you think in jobs you can simply re-weight them for the mission in front of you, bringing more of what it demands and less of what it does not. A player who thinks in items has to memorize a different loadout for every situation; a player who thinks in roles adapts one coherent framework to anything the galactic war throws at them.
The weapon slots
Your three weapon slots, primary, secondary, and grenade, should complement rather than duplicate each other. The primary is your workhorse; pick it to fill the biggest gap your stratagems leave, usually crowd control against bugs or precision and penetration against bots, as our best primary guide explains in detail. The secondary is your backup and your answer to specific problems, whether that is a hard-hitting sidearm for emergencies, a grenade pistol for closing bug holes and bot fabricators, or a stun-capable option for creating space.
Grenades are easy to under-value but do real work. Some destroy structures like bug holes and fabricators, some excel at clearing clustered light enemies, and some stun or control groups. Choose a grenade that fills a gap the rest of your kit does not already cover, and remember that armor passives and warbond choices can add extra grenades or improve how you use them. The three weapon slots together should give you an answer to crowds, a reliable backup, and a tool for structures or control.
The support weapon and backpack decision
Two of your four stratagem slots usually go to a support weapon and a backpack, and this pairing is the heart of most loadouts. The support weapon is your heavy lifter, the thing that answers the armored elites your primary cannot, so pick it first and build around it. Anti-tank options handle Chargers, Hulks, and tanks; sustained-fire options chew through crowds and medium enemies.
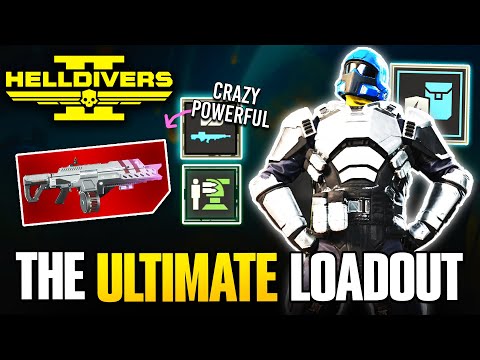
The backpack slot forces a key decision, because some of the best support weapons are backpack-fed and occupy both slots. If you take one of those, you trade away the sustain of a Supply Pack or the protection of a Shield Generator for raw firepower. If you do not, you free the backpack slot for sustain, which is especially valuable solo or on long, grinding missions. There is no universally correct answer; it depends on whether your run needs staying power or more damage. Our best stratagems guide digs into the specific options on both sides of that trade.
Armor that supports the plan
Armor is the piece players most often pick at random, but it should reinforce the rest of your loadout. The armor passive can add grenades, add stims, reduce recoil and explosive damage, reduce enemy detection, or give you a chance to survive a lethal hit, and the weight class governs your speed, stamina, and protection. Choose the passive that amplifies your plan: a grenade-heavy kit wants an extra-grenade passive, an aggressive front-line build wants extra stims, a stealthy objective-runner wants detection reduction.
Match the weight class to how you play, too. If your loadout is built around mobility and avoidance, go lighter; if it is built around holding ground with sentries and absorbing hits, go heavier; medium is the safe default. Our best armor guide covers the passives and weight classes in full, but the core idea is simple: armor should make the rest of your kit work better, not sit as an afterthought.
Example loadout frameworks
Without locking in specific items that patches will change, two framework examples show the method. A bug-front loadout might pair a crowd-clearing primary with a grenade pistol for closing bug holes, a support weapon and stratagems that answer Chargers and Bile Titans, a Supply Pack or Shield Generator for sustain against the swarm, and lighter armor with a stim or detection passive for kiting. Every recurring bug threat, the horde, the armored chargers, the titans, has an owner in the kit.
A bot-front loadout might instead pair a precise, penetrating primary with a hard-hitting secondary, anti-armor stratagems that crack Hulks and tanks at range, an eagle for clearing clustered troops and an orbital for heavy targets, and medium or heavier armor with explosive resistance to survive being pinned. The specifics differ, but the method is identical: assign every recurring threat a tool, and make the armor support the approach.
Notice that in both frameworks the grenade and secondary are doing quiet but real work. The grenade pistol closing bug holes or bot fabricators means you are not burning a stratagem or a lengthy detour to shut down enemy spawns, which pays off across an entire mission. A stun-capable secondary buys you the half-second to reload, reposition, or line up a weak-point shot against a charging heavy. These small slots are easy to treat as afterthoughts, but a loadout that uses all five non-stratagem choices deliberately, primary, secondary, grenade, armor, and booster where relevant, has far fewer dead moments than one that leans entirely on two or three big guns and ignores the rest.
Common loadout mistakes
The most frequent loadout error is redundancy, bringing four stratagems that all do the same job, or weapons that overlap, while leaving a whole category of threat unanswered. A kit with three ways to kill crowds and no anti-armor will crumble the moment a Charger or Hulk appears. Another common mistake is ignoring sustain entirely, loading up on damage and then running dry on ammo and stims with no way to resupply.
A subtler version of the same problem is over-specializing for the enemy you expect and being caught out by the ones you did not. Even a bug mission throws armored chargers and the occasional heavy at you, and even a bot mission has waves of lighter troops to clear, so a loadout tuned entirely for one threat leaves you exposed to the rest. The safest default is a kit that handles its front's main danger emphatically while still keeping a credible answer to the secondary threats, rather than one that is brilliant against a single enemy and helpless against everything else on the map.
The fix for both is the role checklist: before you drop, confirm your kit answers crowds, armor, range, and survival. If one box is empty, swap something until it is filled. Finally, resist copying a loadout you saw online without understanding why each piece is there, because a kit built for an aggressive player will feel wrong on a cautious one. Build for how you actually play.
Bringing the loadout together
A complete Helldivers 2 loadout is a system where primary, secondary, grenade, armor, and four stratagems each own a job and cover for the others. Think in roles rather than items, pick your support weapon and primary to fill the biggest gaps, resolve the backpack trade between sustain and firepower, and choose armor that amplifies the plan. Adapt the framework to the front you are fighting, and verify current performance in-game as the balance shifts.
Because a loadout draws on every system in the game, it rewards reading around it. Our best stratagems guide covers the four-slot half of the kit, the best primary guide helps you choose the gun you fire most, and the best armor guide ties your passive and weight class to the rest of the build. Together they turn a pile of strong items into a loadout that actually works.
Frequently Asked Questions
What makes a good loadout in Helldivers 2?
Coverage. A good loadout assigns a tool to every recurring threat: crowds, armored elites, range, and your own survival. It is a system where each piece covers for the others, not a collection of the strongest individual items.
Should I pick my primary or support weapon first?
Pick the support weapon first, since it handles the armored elites your primary cannot, then choose a primary to fill the remaining gap, usually crowd control against bugs or precision against bots.
Supply Pack or a backpack-fed support weapon?
It is a trade between sustain and firepower. A Supply Pack or Shield Generator keeps you going, while a backpack-fed support weapon maximizes damage but uses both slots. Choose based on whether your run needs staying power or more punch.
Does my loadout need to change per faction?
Yes. Bugs reward crowd control and anti-charger firepower, while bots reward precision, penetration, and explosive resistance. Keep a default kit and swap a slot or two based on the front and mission.
What is the most common loadout mistake?
Redundancy, bringing several tools that do the same job while leaving a whole threat category unanswered, often anti-armor. Run the role checklist before you drop and fill any empty box.
Should my armor match my loadout?
Absolutely. Choose an armor passive that amplifies your plan, such as extra grenades for a throwable kit or extra stims for aggressive play, and a weight class that matches whether you move or hold ground.