
The best ship modules to buy first in Helldivers 2 are the cheap tier 1 upgrades that touch almost every mission: Donation Access License, Liquid-Ventilated Cockpit, Targeting Software Upgrade, Synthetic Supplementation and Dynamic Tracking. After those, put your rare and super samples into Expanded Weapons Bay, Zero-G Breech Loading and the support weapon line, then save requisition for Morale Augmentation once tier 5 opens up. The rest of this page explains what every module does, what it costs and how to plan the order around your own loadout.
Every cost and effect below was checked in early November 2026 against the community Helldivers Wiki's ship module tables and its individual module pages, plus Arrowhead's official announcements on Steam, including the June 2026 progression post from the game director.
How the Super Destroyer Upgrade System Works
Ship modules live in the Ship Management terminal of the Patriotic Administration Center. There are 30 of them, split across six departments: Patriotic Administration Center, Orbital Cannons, Hangar, Bridge, Engineering Bay and Robotics Workshop. Each department has five tiers that must be bought in order, so you cannot jump straight to a tier 3 upgrade without owning the two below it. Tier 4 arrived in April 2024 and tier 5 followed in July 2024, which is why older guides that talk about only 18 upgrades are out of date.
Upgrades are paid for with three kinds of samples, and from tier 4 onward with requisition slips as well. Common samples drop on every difficulty, rare samples start appearing on Challenging (difficulty 4) and super samples only spawn from Extreme (difficulty 6) upward. Buying everything costs 3,830 common, 2,920 rare and 305 super samples plus 335,000 requisition slips in total. Two caps shape how fast you can get there: your account holds at most 500 common, 250 rare and 100 super samples, and no more than 50,000 requisition slips. Requisition earned above the cap is discarded, and samples stop counting once you sit at a cap, so spending as you go matters.
One detail surprises a lot of new players: modules only affect the Helldiver who bought them. If your squad mate has Expanded Weapons Bay and you do not, their Eagle carries an extra payload and yours does not. That makes upgrades a personal investment rather than a team buff, and it is a good reason to match your purchases to the stratagems you actually bring.
The First Five Modules Worth Buying
The opening picks are cheap and help in nearly every drop. None of them needs a super sample, and together they cost a few hundred common samples, which a handful of missions on Medium or Challenging will cover.
- Donation Access License (60 common): support weapons drop with the maximum number of spare magazines. Without it they arrive with roughly half, so a Machine Gun lands with two reloads instead of three and a Railgun with 10 rounds instead of 20.
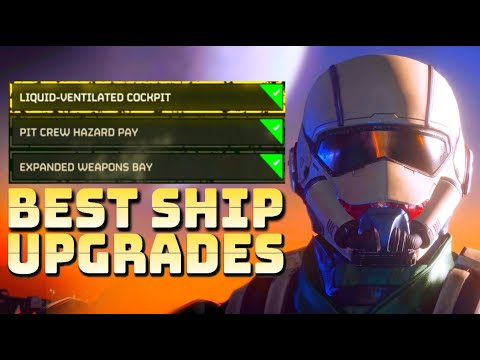
- Liquid-Ventilated Cockpit (80 common): cuts the short cooldown between Eagle calls from 15 seconds to 7.5 seconds. It does not shorten the rearm itself, but it lets you chain two Eagle strikes on one target far more easily.
- Targeting Software Upgrade (60 common): every orbital lands one second sooner. That second matters when a Charger is lining up or a patrol is about to walk out of the blast zone.
- Synthetic Supplementation (60 common, 10 rare): a 10 percent cooldown cut for sentries, emplacements and the Resupply stratagem, so even players who never bring a turret benefit through faster resupply.
- Dynamic Tracking (60 common, 20 rare): sentries launch immediately when called, which the wiki measures as about a three second saving on call-in.
If you buy the tier 1 module in all six departments you also earn the bronze "Ship it!" trophy, which needs 420 common and 30 rare samples in total. Our Helldivers 2 trophy guide covers the rest of the list.
Mid-Tier Upgrades That Change How You Play
Tiers 2 and 3 are where rare samples and your first super samples go, and this is where the Hangar pulls ahead for most players. Pit Crew Hazard Pay (80 common, 40 rare) shortens the Eagle Rearm from 150 to 120 seconds, and Expanded Weapons Bay (80 common, 80 rare, 10 super) adds one extra use of every Eagle stratagem per rearm. For anyone who runs an Eagle Airstrike or 500kg Bomb, that pair is the single biggest jump in raw output the ship offers.

Orbital players should look at More Guns (an extra salvo on barrage orbitals) and Zero-G Breech Loading, which trims 10 percent off every orbital cooldown, including the Railcannon Strike and Orbital Laser. Support weapon users get Streamlined Request Process for a 10 percent shorter support weapon cooldown, followed by Hand Carts for the same cut on backpacks such as the Shield Generator Pack and Jump Pack.
Sentry builds want Advanced Construction (sentries get 50 percent more health) and Shock Absorption Gel (50 percent more sentry ammo) from the Engineering Bay and Robotics Workshop. On the Bridge, Nuclear Radar widens the radius at which enemies show up on your minimap by 50 percent, which is excellent for routing around patrols, while Power Steering simply makes your Hellpod easier to steer on the way down. If you are still unlocking the stratagems these upgrades boost, our breakdown of the best stratagems to unlock pairs well with this list.
Tier 4 and 5: Spending Requisition Wisely
The top two tiers ask for between 20,000 and 35,000 requisition slips on top of large sample bills, so they deserve a plan. Because the slip cap is 50,000 and every tier 5 module costs at least 30,000, you can never bank enough for two tier 5 upgrades at once, and you will often be waiting on rare or super samples rather than slips anyway.
Morale Augmentation on the Bridge is the strongest general pick: it costs 250 common, 200 rare, 20 super and 35,000 slips and cuts the cooldown of every stratagem by 5 percent, Resupply and Hellbomb included. Superior Packing Methodology makes a Resupply box refill a support weapon to its full magazine count, which turns ammo-hungry picks like the Autocannon into much steadier choices, and Payroll Management System shaves 10 percent off support weapon reloads.
The Hangar finishes with XXL Weapons Bay (multi-bomb Eagle strikes drop one extra bomb) and Advanced Crew Training, which takes a further 10 percent off the rearm when you send Eagle-1 home with payload left, bringing a fully upgraded manual rearm down to 108 seconds. Enhanced Combustion adds 25 percent fire damage to stratagems, Circuit Expansion lets lightning arcs jump to one more enemy, and Streamlined Launch Process makes support weapons launch immediately. Sentry players get Blast Absorption (sentries take half damage from explosions) and Cross-Platform Compatibility, which tells Mortar Sentries to prioritize targets you have marked.
| Department | Tier 1 | Tier 2 | Tier 3 | Tier 4 | Tier 5 |
|---|---|---|---|---|---|
| Patriotic Administration Center | Donation Access License: 60 / 0 / 0 | Streamlined Request Process: 80 / 40 / 0 | Hand Carts: 80 / 60 / 5 | Superior Packing Methodology: 150 / 150 / 15 + 20,000 | Payroll Management System: 200 / 200 / 20 + 30,000 |
| Orbital Cannons | Exploding Shrapnel: 100 / 0 / 0 | More Guns: 80 / 60 / 0 | Zero-G Breech Loading: 80 / 80 / 10 | Atmospheric Monitoring: 200 / 150 / 15 + 25,000 | High-Density Explosives: 250 / 200 / 20 + 35,000 |
| Hangar | Liquid-Ventilated Cockpit: 80 / 0 / 0 | Pit Crew Hazard Pay: 80 / 40 / 0 | Expanded Weapons Bay: 80 / 80 / 10 | XXL Weapons Bay: 150 / 150 / 15 + 25,000 | Advanced Crew Training: 200 / 250 / 25 + 30,000 |
| Bridge | Targeting Software Upgrade: 60 / 0 / 0 | Nuclear Radar: 80 / 40 / 0 | Power Steering: 80 / 80 / 10 | Enhanced Combustion: 200 / 150 / 15 + 25,000 | Morale Augmentation: 250 / 200 / 20 + 35,000 |
| Engineering Bay | Synthetic Supplementation: 60 / 10 / 0 | Advanced Construction: 80 / 60 / 5 | Rapid Launch System: 80 / 80 / 10 | Circuit Expansion: 200 / 150 / 20 + 20,000 | Streamlined Launch Process: 250 / 200 / 25 + 30,000 |
| Robotics Workshop | Dynamic Tracking: 60 / 20 / 0 | Shock Absorption Gel: 80 / 40 / 5 | High-Quality Lubricant: 80 / 80 / 10 | Blast Absorption: 150 / 150 / 20 + 25,000 | Cross-Platform Compatibility: 250 / 200 / 30 + 35,000 |
Picking a Department to Max for Your Loadout
Because upgrades are personal, the smartest order follows the stratagems you bring most. An Eagle-heavy diver should finish the Hangar early, since every one of its five tiers adds Eagle damage or uptime. A player who lives on the Orbital Railcannon, Laser and Precision Strike gets more from Zero-G Breech Loading and Targeting Software Upgrade than from anything in the Hangar. Turret and minefield builds should push the Engineering Bay and Robotics Workshop together, and support weapon specialists should treat the Patriotic Administration Center as their main line.
Trophy hunters have one more reason to pick a lane. The silver "Fully operational" trophy only asks you to max a single department, and the cheapest one to finish is the Patriotic Administration Center: 570 common, 450 rare and 40 super samples plus 50,000 requisition slips across all five tiers. That trophy was easier at launch when there were only three tiers, and it was never adjusted when tiers 4 and 5 were added, so plan for the full bill.
Requisition is the other bottleneck. Stratagems, weapon attachments and these top tiers all draw from the same 50,000 slip wallet, so our requisition slips explainer is worth reading before you spend a full cap on one upgrade.
Farming the Samples Without Burning Out
Super samples are the slowest part of the climb. The wiki's spawn data puts two to three of them on an Extreme map, three to four on Suicide Mission, five on Impossible, six on Helldive and three to seven on Super Helldive, mostly at the distinctive Super Sample Rock. Common and rare samples are far more plentiful, with up to 40 commons and 35 to 41 rares on the hardest maps.
Samples are shared by the whole squad, but someone has to be carrying them when the shuttle leaves, so a wipe on the extraction pad costs everyone. Two boosters help: Sample Scanner gives a 15 percent chance to double each pickup, and Sample Extricator lets large enemies drop samples, capped at 10 extra drops per mission. Our booster rankings cover when each one is worth a slot, and the older super samples farm route walks through a fast pink sample run.
Once you hit a cap, spare samples are not wasted entirely: you can donate up to 75 common and 50 rare samples every 24 hours to Democracy Space Station Tactical Actions. Looking ahead, Arrowhead's game director wrote in June 2026 that a ship module overhaul with more player choice, plus entirely new ships, is in development. As of early November 2026 no release date has been given, so the 30-module system above is what you are building toward today.
If You Would Rather Skip the Sample Grind
Finishing all six departments takes hundreds of samples and well over 300,000 slips, and a lot of players simply want the upgrades in place before they move up to Helldive. The store's Helldivers 2 boosting page groups its progression services in one place, including ship module upgrades, max sample runs and requisition slip farming, with listings for PC and PlayStation accounts. Xbox is not among the platforms the page lists. Each card opens a product page with the platform options and delivery details, so check that page for current availability before you order.
Frequently Asked Questions
What ship module should I buy first in Helldivers 2?
Start with Donation Access License for full support weapon ammo, then Liquid-Ventilated Cockpit for faster Eagle calls. Both cost only common samples and help in almost every mission.
How many ship modules are there in total?
There are 30 modules: six departments with five tiers each. Tier 4 was added in April 2024 and tier 5 in July 2024.
Do my ship upgrades help my whole squad?
No. A module only affects the Helldiver who bought it, so each player has to buy their own upgrades for their own stratagems.
How many super samples do I need to max every module?
Fully upgrading all 30 modules takes 305 super samples, along with 3,830 common samples, 2,920 rare samples and 335,000 requisition slips.
Why did my samples stop going up?
You probably hit a cap. Accounts hold at most 500 common, 250 rare and 100 super samples, so once you reach a cap, more samples of that type stop adding to your total. Spend some before your next sample run.
Which department is cheapest to max for the Fully operational trophy?
Max out the Patriotic Administration Center. It has the smallest sample bill of any department, at 570 commons, 450 rares and 40 supers, and its two top tiers use up exactly one full 50,000-slip wallet between them.