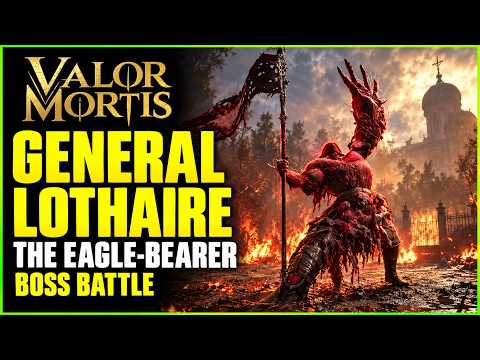
The first boss fight in Valor Mortis is General Lothaire, the Eagle-Bearer, and you meet him twice: once on the Battlefield at the end of Chapter I, in an encounter most guides treat as a designed loss, and again outside the Abandoned Church at the end of Chapter II, where the real kill happens. The rematch is a two-phase duel built around parrying his spear, popping three glowing growths with your Pistol and dodging anything that glows red. Here is how both fights work and how to win the one that counts.
We checked this against All Things How's Lothaire walkthrough, Method.gg's and KeenGamer's boss guides, the GAMES.GG write-up, the metabot.gg boss and mechanics data and Steam's achievement stats in November 2026.
The Battlefield Encounter: Can You Win It?
You reach Lothaire by following the trench east from the Field Encampment Lantern, the third Lantern on the Battlefield. All Things How, KeenGamer and GAMES.GG all describe this first meeting as scripted: wear down his bar or not, the scene ends with William beaten. There is no death screen. A dark cutscene plays, Lucjan steps in, and you wake beside him at the Guidepost Lantern in the Valley of Ashes with your Catalysts intact. Losing locks nothing and the boss is not missable.

Not every guide agrees it is unwinnable. Method.gg says Lothaire can be defeated during the initial Battlefield section, in which case there is no battle at the church, and GAMES.GG reports that beating him on your first attempt grants the Torn Banner achievement and an extra Catalyst Clot worth 10,000. Our read: treat the Battlefield fight as free practice. Learn his combos, see the red-glow attacks, and if you happen to take him down, enjoy the bonus. Do not burn Catalysts or flasks trying to force it, because the rematch is where the game expects you to win.
Lothaire's Stats and Weaknesses
Knowing the numbers helps you choose your tools. According to the metabot.gg data and All Things How's breakdown of the rematch:
- Health: two bars of 1,800, one per phase.
- Posture: 500 in both phases. Parries and heavy hits fill it, and a full bar drops him to one knee for a Critical Attack.
- Fire: he takes 40% extra fire damage, although he resists Ignite build-up by 30%.
- Stasis: resisted by 50%, so leave it for later bosses.
- Headshots: double damage to the head.
- Unblockables: nine of his eighteen attacks cannot be blocked and must be dodged.
- Weak points: three glowing red Nephtoglobin growths on his left shoulder, hip and right thigh. Shooting them drops Nephtoglobin Remnants, which refill the resource that powers your Transmutations.
Put together, that points to one loadout: a blade for parrying, the Pistol for the growths, and the Fire Transmutation you receive at an altar early in Chapter I. If you are still choosing your melee weapon, the best build guide explains why the Saber's parries suit this duel.
Every Attack and How to Answer It
All Things How logged his full move list with damage values. The blockable ones are the attacks you want to parry, because a parry negates all damage, costs no Endurance and builds his posture.

- Wide sweep, low sweep, close swing and overhead slam (37 each): parry these. They make up most of his three-hit spear strings.
- Lunge and charge (37): parryable as well, and a clean parry here is one of the fastest ways to fill his posture from range.
- Single pistol shot (20): block or parry it.
- Red-outlined leap (50, unblockable): his body glows red-orange before he jumps. Dodge as he lands, not when he takes off.
- Pistol volley (three shots of 20, unblockable): follows a two-hit combo. Dodge sideways.
- Bash (50), grab (20) and a thrown corpse that explodes: all unblockable. Dodge through or out of them.
- Shockwave (32, heavy posture damage to you): jump over it.
- Spike line (40, heavy posture damage to you): strafe sideways out of its path.
The dodge itself gives 0.25 seconds of invulnerability, so dodging into a swing at the moment of impact is far more reliable than rolling away early. Method.gg also points out that dodging his opening jump slam at contact gives you a slow-motion counter window.
Winning the Rematch Phase by Phase
The rematch waits at the far end of the Valley of Ashes, past the Quarry and its ziplines, outside the Abandoned Church. A Lantern sits right outside the arena, so each retry is a short walk through the golden fog wall.
Phase one. Let him come to you. Parry his three-hit strings to fill his posture, and when he staggers, take the Critical Attack. Between strings, shoot one growth at a time to top up Nephtoglobin, then spend it on Fire during his recovery windows or right after a combo. Keep some Pistol rounds back, because the growths come back in phase two and the Pistol only holds five.
Phase two. He regrows his limbs and comes back with four harder combos built around 50-damage hits, several of them unblockable. He also calls in help: either three Risen Soldiers or two Risen Musketeers. Each has only 1 Health, so cut down the ones near you and dodge the musket glints from the others. Re-apply Fire immediately, shoot the new growths from range, and watch for his orb attack, which either sends homing spikes after you (run) or slams a shockwave across the ground (jump).
The kill pays 10,000 Catalysts, a Commander's Catalyst Clot worth another 10,000 when used, and the Torn Banner achievement. About 63% of Steam players have Torn Banner as of November 2026, so if you are stuck here you are in good company, and the fix is usually preparation rather than reflexes.
Mistakes That Get Players Killed
Most failed attempts against Lothaire come down to the same handful of habits, and all of them are easy to fix once you know to look for them.
- Blocking everything. A block still lets half the damage through and drains Endurance, and you start with only 80 Endurance. Against a boss who chains three hits, holding block empties your bar and leaves you open. Parry the blockable hits and save Endurance for dodges.
- Trying to block red attacks. Nothing that glows red can be blocked. If you see the red-orange outline before his leap, your only answer is to move.
- Emptying the Pistol in phase one. Five rounds go fast. If you spend them all on the first set of growths, phase two starts with no way to reach the new ones, and your Nephtoglobin dries up exactly when you need Fire most.
- Ignoring the adds. The Risen Soldiers and Musketeers he summons die to a single hit, but a musket shot from behind while you are mid-parry is how many second-phase attempts end. Clear the close ones first.
- Healing at the wrong time. Drinking right after his three-hit string, when he is recovering, is the safe window. Drinking while he is winding up a leap or a volley usually wastes the charge.
- Walking in with unspent Catalysts. Death drops what you carry, and dying a second time before recovering it deletes it.
Preparation That Makes the Difference
Method.gg suggests going in no earlier than level 8, with Maximum Health maxed on the first nodes, two points in Endurance, and upgrades that lower block cost and raise the Health you recover from blocks. Our own checklist:
- Reach level 5 first. That opens your first Amber slot. Duellist's Focus, found in a Battlefield chest, widens the parry window and is the best single Amber for this fight. The Amber guide shows how to slot it.
- Spend your flask upgrades. The Valley of Ashes holds two Power Upgrades and an Empty Ferrofluid Flask before the rematch. Even 60 or 70 healing per sip changes how many mistakes you can afford; the Ferrofluid upgrade guide lists exactly where they are.
- Bank your Catalysts. Level up at the Lantern outside the arena so a death costs you nothing.
- Practice the parry on regular enemies. The default window is 0.2 seconds, and most of Lothaire's blockable hits use it.
After the fight, James unlocks his Iron Bench at the church for weapon upgrades, and the road opens to Chapter III and The Iron Marshall. Our complete boss order shows what comes after, and if Lothaire is making you wish for an easy mode, the page on difficulty settings explains what the game does and does not offer.
Want to Start Stronger?
If you would rather enjoy the Lothaire duel without grinding levels for it, the store's Mega Modded Save opens at the very beginning of Chapter I, at the first Lantern, so you still play the Battlefield and the rematch yourself, but with a level 264 character, every skill active, five weapons at Lvl 5 and a fully upgraded flask. You can drop back to level 1 at any Lantern with Reset Level and keep your Catalysts if you want the real fight later.
The save is PS5 and PC only, with no Xbox version, and the game is not included. Browse the rest on the Valor Mortis page.
Frequently Asked Questions
Who is the first boss in Valor Mortis?
General Lothaire, the Eagle-Bearer. You first face him on the Battlefield in Chapter I and beat him for good at the Abandoned Church at the end of Chapter II.
Are you supposed to lose to Lothaire?
Most guides say yes, the first encounter is scripted to end with William beaten. At least one guide reports a first-attempt win is possible, but the church rematch is the intended victory.
What is Lothaire weak to?
Fire, which deals 40% extra damage, plus headshots and the three red growths on his shoulder, hip and thigh. He resists Stasis.
What level should I be for Lothaire?
Method.gg recommends at least level 8, with early points in Maximum Health and Endurance.
What do you get for beating Lothaire?
10,000 Catalysts, a Commander's Catalyst Clot worth another 10,000, and the Torn Banner trophy. James then sets up his Iron Bench at the church.
Where do you respawn if you die in the rematch?
At the Lantern just outside the arena, a short walk from the golden fog wall.