
Picking armor in S.T.A.L.K.E.R. 2: Heart of Chornobyl is never about one number. A suit that stops bullets may leave you exposed to chemical anomalies, and the heaviest exoskeleton on the map can wreck your stamina and mobility if you wear it in the wrong situation. The best armor is the one that fits the threat in front of you.
The details below were checked in October 2026 against the official S.T.A.L.K.E.R. wiki, Fextralife armor listings, GameRant guides and community testing on the game's subreddit. Where exact protection values are disputed, I describe the tradeoffs rather than inventing precise figures.
How armor protection actually works
Every suit in the Zone splits its defense across several categories: ballistic and melee protection, plus resistances to the environmental hazards you meet in anomalies, which are the thermal, chemical, electrical, radiation and psy fields. A suit can be excellent against gunfire and still cook you in a thermal field, so reading the full resistance spread matters more than the headline armor rating.
Carry weight and stamina are part of the equation too. Heavier armor lets you haul more loot and survive more hits, but it drains stamina faster and slows you down, which is dangerous when a pack of mutants is chasing you. Understanding the anomaly side pairs naturally with our breakdown of anomaly types and how to survive them.
There is also the matter of upkeep. Armor degrades as you take hits, and a worn suit protects far less than the same suit in good condition, so a nominally weaker armor you keep repaired can outperform a stronger one you let fall apart. Factor repair cost into which suit you can realistically wear every day, because a suit you cannot afford to maintain is not actually protecting you.
Best early and mid-game suits
Early on you are working with rookie jackets, bandit leathers and light combat suits. These keep you alive against other stalkers but offer little against anomalies, so your early survival leans heavily on positioning and detectors rather than on soaking damage. At this stage, avoiding hits is far more reliable than trying to tank them.
As you progress, the Zorya and comparable mid-tier combat suits become the sensible daily wear. They strike a usable balance of ballistic protection and resistances without crushing your mobility, and they are affordable enough to repair regularly. This is the tier where most players spend the bulk of a playthrough, and there is no shame in sticking with a dependable mid-tier suit long after flashier options appear.
The temptation to rush toward the heaviest armor you can find is worth resisting. A mid-tier suit that leaves you nimble and solvent often keeps you alive more consistently than a premature heavy suit that empties your coupons on repairs and saps the stamina you need to escape bad situations.
The SEVA suit and anomaly specialists
The SEVA suit is the classic specialist choice for deep anomaly work. It trades some raw ballistic protection for strong resistance across the environmental hazards, which makes it the suit you want when a quest sends you through heavily irradiated or chemically saturated areas. Dedicated scientific and anti-radiation suits exist for the worst zones, and swapping into one before a hazardous expedition can be the difference between surviving and bleeding out to a field you could not see.

The lesson here is that a smart stalker owns more than one suit. Keep a combat-focused armor for human fights and an anomaly-focused suit for expeditions. Hauling both is heavy, so plan your loadout around the job rather than wearing one suit for everything. Many players stash a specialist suit at a settlement and only carry it when a mission clearly calls for it, which keeps their everyday weight manageable.
Anomaly specialist suits also change how you approach artifact hunting. With the right resistances you can linger in a field long enough to actually collect the artifact rather than dashing in and out, which ties directly to building a strong artifact loadout. The suit, in other words, is often the gatekeeper to the Zone's best rewards.
Exoskeletons and the endgame
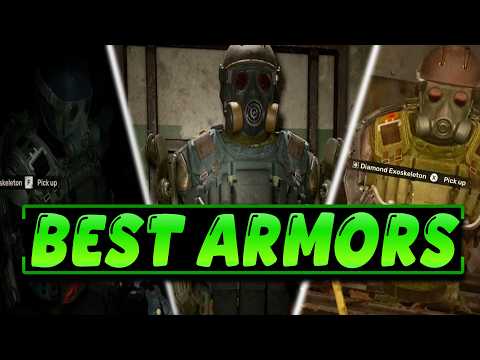
Exoskeletons are the top of the armor food chain. They offer the highest protection and the largest carry capacity in the game, letting you tank hits and lug an enormous amount of loot or ammunition. The battle and diamond exoskeleton variants add built-in combat benefits on top of raw defense, and reaching one of these feels like a genuine milestone.
The catch is mobility and stamina. A heavy exoskeleton changes how you move and can make sprinting away from danger a liability rather than an option. They are also expensive to maintain. Treat an exoskeleton as endgame kit for set-piece battles and loot runs, not as a suit you casually wander the map in, and be aware that its enormous carry capacity makes it dangerously easy to overburden yourself if you are not disciplined about what you pick up.
Upgrades and artifact slots
Armor, like weapons, improves at technicians. Upgrades can raise durability, reduce weight penalties, boost specific resistances and, importantly, add artifact container slots. Those slots let you equip protective artifacts safely, which effectively turns a good suit into a customizable platform. Prioritizing the right paths is worth its own read in our guide to the best upgrades to prioritize.
Because artifact slots interact so directly with armor, the two systems reward being planned together. A suit with extra slots plus well-chosen protective artifacts can cover a weakness the base armor cannot, for instance adding anomaly resistance to a combat suit or bleeding protection to a specialist one. In practice, the strongest defensive setups in the game are a suit and an artifact loadout designed as a single package rather than two separate choices.
Tuning armor to mutants and humans
A detail that trips up new stalkers is that mutants and human enemies threaten you in different ways, and the armor that shines against one can feel thin against the other. Human firefights are mostly about ballistic protection, since the danger is incoming gunfire from cover. Mutant encounters, by contrast, often come down to melee and close-range bursts, so physical protection and the stamina to keep moving can matter more than raw bullet resistance.
This is why a single suit rarely feels perfect everywhere. A heavy combat armor that laughs off rifle rounds can still leave you winded and cornered when a pack of dogs or a bloodsucker closes in, because the stamina drain from the weight works against you in exactly the situation where mobility saves lives. Reading the region you are heading into, and what tends to live there, should inform which suit you wear.
Resistances deserve the same regional thinking. Some areas of the Zone are saturated with radiation or thick with chemical hazards, and in those places a suit with strong environmental resistance quietly keeps you alive while a pure combat armor slowly drains your health no matter how well you fight. The threat is not always something you can shoot, and your armor is often your only answer to it.
The practical habit is to treat armor as a decision you revisit at each settlement rather than a one-time purchase. Before a long expedition, think about whether you expect humans, mutants, anomalies or a mix, and choose the suit that covers the likeliest danger. That small routine, repeated across a playthrough, prevents most of the deaths that come from simply wearing the wrong armor into the wrong fight.
New stalkers often agonize over armor long before they have the coupons to act on it, when the honest early-game answer is simple: wear whatever keeps you alive and affordable to repair, and lean on avoidance rather than absorption. The opening regions are survivable in basic jackets and light suits precisely because you are expected to use cover, distance and your detector rather than tanking damage.
Rather than saving endlessly for a dream suit, put your early resources toward a dependable mid-tier combat armor as soon as one is within reach, then keep it repaired. That steady, maintained protection will carry you through far more of the game than most newcomers expect, and it frees your coupons for ammunition, medicine and the upgrades that actually move the needle. The exoskeletons and specialist suits can wait until your economy can comfortably support them.
Skipping the grind with a prepared save
Earning a full wardrobe the honest way means exploring, looting, selling and funding each suit and its upgrades from technicians over many hours. That progression is a core pleasure of the game, and most players enjoy building up to their first exoskeleton the hard way.
If you would rather skip the grind and have every suit and exoskeleton already unlocked, the STALKER 2 Fully Upgraded Gear save is a modded save file (PS5/PC, you must own the game) that stocks every armor piece and weapon at maximum quantity with a full coupon balance. It hands you the sandbox rather than cheating during live play. The rest of our coverage lives on the STALKER 2 page.
Frequently Asked Questions
What is the best all-around armor in STALKER 2?
Mid-tier combat suits like the Zorya are the best daily wear for most of the game, balancing ballistic protection and resistances without wrecking your mobility.
Is the SEVA suit worth it?
Yes, as a specialist. It trades some ballistic protection for strong anomaly resistance, making it ideal for deep expeditions into irradiated or chemically hazardous areas.
Should I always wear an exoskeleton once I have one?
No. Exoskeletons offer top protection and carry weight but hurt stamina and mobility. Use them for heavy fights and loot runs, not casual travel.
Do I need more than one suit?
It helps a great deal. A combat suit for human fights and an anomaly-resistant suit for expeditions cover very different threats that no single suit handles perfectly.
What do armor upgrades do?
They can increase durability, reduce weight penalties, improve resistances and add artifact container slots, which let you safely equip protective artifacts.
How do I keep armor from falling apart?
Repair it at technicians before it drops too low, and consider durability upgrades. Worn armor protects far less than armor kept in good condition.