
Operations is the three-player PvE mode in Warhammer 40,000: Space Marine 2, and it is where most players spend the bulk of their time once the campaign is finished. Each Operation is a self-contained mission that runs parallel to the single-player story, and the mode is built around replaying those missions at steadily harder difficulties to earn experience, currency, and weapon unlocks. If the campaign is the cinematic showcase, Operations is the long-term game that keeps players coming back.
Facts here were checked in October 2026 against the official Space Marine 2 site and patch notes, the community wiki, and discussion on the r/Spacemarine subreddit. Because Saber Interactive patches class and weapon balance regularly, treat any power-level comment as qualitative and confirm specifics in-game.
What Operations actually is
Operations drops a squad of three Space Marines into objective-based missions against either the Tyranid swarm or the Thousand Sons of Chaos. Missions mix traversal, defense sequences, and set-piece boss encounters, and they are designed to be run many times rather than cleared once. You can fill empty squad slots with AI companions, so solo and duo play are viable, though the AI will not use class abilities as cleverly as a coordinated human team.
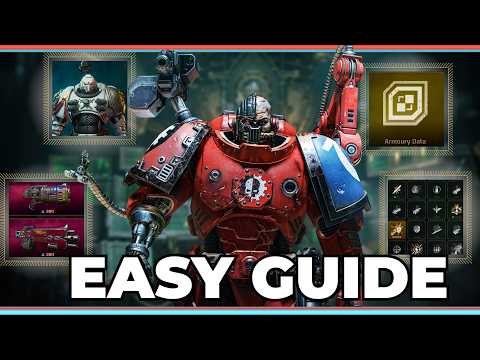
Progress in Operations is separate from the campaign. You level classes, unlock weapon variants, and apply perks that only exist in this mode, so the time you invest here builds a distinct progression track. That separation is worth understanding early, because a player who finishes the campaign and expects to be fully geared for Operations will find they are starting a fresh climb.
The loop rewards repetition. You pick a mission and difficulty, complete objectives, extract, and bank the rewards. Higher difficulties multiply experience and currency but punish mistakes far more harshly, so the smart path is to climb one tier at a time rather than jumping straight to the top. Treat your early runs as both income and practice, learning the mission layouts and spawn patterns that make later, harder attempts far smoother.
The six classes at a glance
Operations has six classes, each with a signature ability and a restricted weapon pool. Tactical is the generalist, built around the Auspex Scan that marks a target and boosts incoming damage, and it has access to a wide range of ranged weapons. Assault uses a jump pack for aerial slams and leans heavily on melee. Vanguard carries a grapnel launcher to close distance instantly and rewards aggressive melee play. Bulwark brings a combat shield and a planted banner that heals and enables revives. Sniper has a cloaking ability and the longest-range weapons. Heavy wields the biggest guns in the game behind an Iron Halo energy shield but gives up the dodge roll other classes rely on.
No single class is mandatory. A balanced squad usually wants someone who can hold a frontline, someone who can delete elites at range, and someone flexible in the middle, but the game is forgiving enough that any mix can clear content with good fundamentals. Each class also levels independently, so investing in one does not advance the others, which is worth bearing in mind before you spread your attention thin across all six.
If you are new, the Tactical is the gentlest introduction. It has no glaring weakness, its Auspex Scan helps the whole squad, and its broad weapon pool lets you experiment with different ranged styles while you learn the game’s rhythms. From there you can branch toward whatever fantasy appeals, whether that is the Bulwark’s immovable shield wall or the Assault’s leaping melee.
The difficulty ladder
Difficulty rises through named tiers, starting gentle and climbing to the hardest settings the developers have added over the game’s life, including Lethal and the later Absolute tier. Each step up increases enemy health and damage, adds more elite and special spawns, and tightens the margin for error. On the highest tiers, friendly fire and ammunition scarcity become real constraints, and a single ignored special enemy can wipe a run.

The practical advice is to gear and level your class comfortably on a mid tier before attempting the top. You want enough weapon perks unlocked that your damage keeps pace with the inflated enemy health, otherwise fights drag on, ammo runs dry, and the horde overwhelms you. Do not be afraid to drop a tier to farm unlocks, then climb back up once your loadout can handle the next step.
Higher difficulties also change behavior, not just numbers. Enemies pressure you more aggressively, specials spawn in combinations that demand target priority, and the forgiving pace of lower tiers disappears. Many players who stall on a tier are not under-geared so much as playing too loosely, and tightening up positioning, parries, and ammo discipline often matters more than another weapon perk.
Enemies you need to recognize
Space Marine 2 sorts enemies into broad threat classes, usually described as Minoris swarm fodder, tougher Majoris troops, dangerous Extremis specials, and Terminus-tier bosses. Against the Tyranids you will face endless Gaunts, armored Warriors, leaping Raveners, ranged Zoanthropes, and towering Carnifexes, while the Thousand Sons bring Rubric Marines, flamers, sorcerers, and shielded troops that demand different handling.
The single most important habit is learning which specials must die first. Floating Tyranid Zoanthropes, for example, are immune to most fire until you break their shield with specific weapons, and leaving them alive means constant ranged pressure. Thousand Sons sorcerers buff and resurrect nearby units, so collapsing them collapses the encounter. Prioritizing these targets matters far more than raw damage output.
Reading the battlefield is a skill in itself. Keep an eye on the edges of a fight, because specials often arrive from the flanks while the swarm holds your attention in front, and the moment you tunnel-vision on fodder is the moment a Majoris or Extremis threat lands a punishing hit. A good rule is to glance for the dangerous silhouette first and the swarm second.
Armor, contested health, and parrying
Survival in Operations is governed by two interacting systems. Your armor segments absorb hits, and you restore them not by hiding but by landing melee gun-strikes on staggered enemies or by parrying attacks flagged with the parry indicator. Unblockable attacks, shown with a different indicator, must be dodged instead. Learning the difference on sight is the core defensive skill of the game, and it is the thing that separates a player who survives Lethal from one who stalls out.
The second system is contested health. When you take damage your health bar shows a recoverable portion for a short window, and dealing damage quickly restores it. This encourages a counterintuitive aggression: after a hit, the correct response is often to strike back immediately rather than retreat. Combined with armor regeneration from parries and executions, a confident player can sustain themselves through fights that look lethal on paper.
Executions deserve special mention. Finishing a staggered Majoris with an execution not only removes a threat but refills armor and briefly grants a measure of protection, so weaving executions into a fight is both offense and defense. The whole combat system is designed to reward forward, decisive play, and once that clicks, Operations transforms from a game of attrition into a rhythm you control.
Rewards, customization, and the long game
Beyond raw power, Operations is also where you build the Space Marine you want to look at. The mode offers deep armor customization, letting you set chapter colors, heraldry, and individual armor pieces so your character reflects your favorite corner of the setting. None of that changes your performance, but it is a meaningful part of the long-term appeal, and many players treat earning the components for a particular look as a goal in itself alongside gameplay unlocks.
The functional rewards are what keep you climbing. Each run banks class experience and currency toward the perks and weapon upgrades that let you attempt the next difficulty, so progression and challenge pull against each other in a healthy loop. There is no shortcut worth chasing here: steady completions at a difficulty you can handle build your power faster than repeated failures at one you cannot, because a failed extraction can cost the rewards you were working toward.
Treat Operations as a marathon rather than a sprint. Spread your time across the classes and weapons you enjoy, let your unlocks accumulate naturally, and the hardest tiers will feel reachable rather than punishing by the time you get there. The players who burn out are usually the ones who rush the climb before their loadout is ready.
Putting it together and where to read next
A clean Operations run comes down to class fundamentals, target priority, and respecting the armor and parry loop rather than any single overpowered build. Pick a class whose rhythm suits you, learn the enemy roster, and climb difficulty gradually while unlocking the perks that keep your damage relevant. From there, specialization is where the real depth lives, and the difference between a struggling squad and a smooth one is usually habits rather than gear.
If you want to go deeper on a specific role, our overview of the best classes breaks down each one’s strengths, and the best weapons breakdown covers which guns reward the effort of unlocking them. For players who mostly queue without a full team, the best class for solo play guide is a useful companion.
Frequently Asked Questions
Can I play Operations completely solo?
Yes. Empty squad slots are filled by AI companions, so you can complete missions alone. The AI is competent at surviving and dealing damage but will not coordinate class abilities, so some high-difficulty strategies are easier with human teammates.
How many classes are there in Operations?
Six: Tactical, Assault, Vanguard, Bulwark, Sniper, and Heavy. Each has its own ability, weapon pool, and perk tree, and each levels independently.
What is the best way to earn experience?
Repeat missions at the highest difficulty you can clear reliably. Higher tiers pay more experience and currency, but a steady completion on a mid tier beats repeatedly failing a harder one.
How do I restore my armor?
Armor refills when you land melee gun-strikes on staggered enemies, perform executions, and successfully parry attacks marked with the parry indicator. Standing back and waiting does not restore it.
Which enemies should I kill first?
Prioritize special and elite units that apply ranged pressure or buff others, such as Tyranid Zoanthropes and Thousand Sons sorcerers. Swarm fodder can be managed after the dangerous specials are down.
Do campaign progress and Operations progress share the same levels?
No. Operations has its own class levels, currency, and weapon unlocks that are separate from the single-player campaign.