
In Red Dead Online, your horse is the tool you rely on more than any other. It carries you across a vast and often dangerous map, hauls carcasses for your roles, holds its nerve in a firefight, and is frequently the difference between escaping trouble and dying in it. Choosing and raising the right mount makes everything smoother, from hunting to deliveries to fleeing a griefer. This practical guide explains how horses actually work beneath the surface and how to pick and develop one that genuinely fits your play style.
To keep this accurate, the details below were cross-checked against the Red Dead Wiki, the r/RedDeadOnline community on Reddit, and Rockstar Games Support, checked in October 2026. Because Rockstar has wound down major Red Dead Online updates, no large new content is expected, but the mode remains fully playable and every system described here is stable. Where a specific number, name, or location could drift, this guide stays qualitative and points you back to the wiki or to in-game menus to confirm.
How horse stats work
Horses in Red Dead Online are defined by a handful of core stats, chiefly health, stamina, speed, and acceleration, along with a handling feel that varies noticeably by breed. Health governs how much punishment a horse can take before it goes down, stamina determines how long it can gallop before tiring, and speed and acceleration together shape how quickly it moves and how sharply it responds to your inputs. Different breeds lean toward different combinations of these strengths, which is a big part of why no single horse is perfect for everyone.
Beyond the raw numbers, temperament matters more than beginners expect. Some horses are naturally calmer under gunfire and far less likely to panic, rear, or bolt, which is genuinely valuable in combat and when dealing with predators on a lonely trail. When comparing mounts at a stable, study the stat bars but also pay attention to how each horse is described, because a nervous horse that throws you or runs off at the worst possible moment can easily get you killed in a tense situation.

Why breed matters
Breed is the single biggest factor in a horse's overall capability. Certain breeds are widely recognized as top-tier all-rounders with strong, balanced stats, and the Arabian breeds in particular have a long-standing reputation among the community as some of the very best mounts in the game for well-rounded performance. Other breeds, such as the heavier draft and work horses, trade outright speed for strength and are excellent for hauling, while lighter racing breeds favor speed and nimble agility over toughness.
The right breed for you depends entirely on your priorities. If you want a single do-everything mount you will ride for most situations, a balanced high-stat breed is the safest choice and rarely disappoints. If you prefer to specialize, perhaps hauling heavy loads for Trader work or racing flat-out across the map as a Collector, you might favor a breed that leans hard into that one strength. Because specific availability, breeds on offer, and prices can change within the game over time, always verify the current options at the stable rather than assuming.
Bonding and why it transforms your horse
A horse's bond level dramatically changes how capable it feels to ride. As you raise your bond by riding, feeding, patting, brushing, and generally caring for your horse, it progressively unlocks better handling, extra maneuvers, and improved overall performance. This effect is strong enough that a fully bonded horse of a fairly modest breed can genuinely outperform a neglected horse of a better one. Bonding is therefore not optional polish to chase later; it is core to getting real value out of any mount you choose.
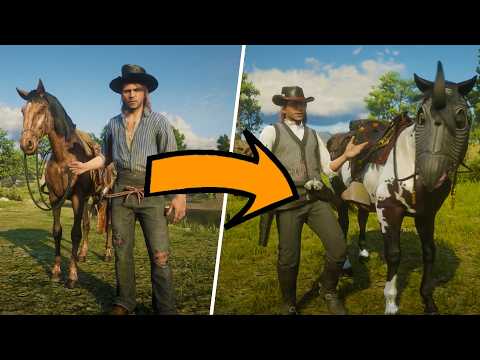
Bonding takes consistent time spent with the same horse, which is a very good reason not to constantly swap mounts in search of something marginally better. Pick a horse whose stats and feel you genuinely like, commit to it, and patiently build the bond through regular use and care. Keep it fed and in good health along the way, and it will reward you with crisp responsiveness, steadiness under fire, and the special movement options that make riding across the frontier feel effortless rather than fiddly.
Care, tack, and keeping your horse alive
Ongoing care is what keeps your horse performing at its best over the long term. Feeding maintains its cores and stamina, regular brushing and cleaning keep it healthy, and reviving it quickly with a tonic after it has been downed in a fight is the only way to prevent losing it permanently. Good tack, meaning the saddle and its related equipment, can improve your horse's effective stat ratings and reduce how quickly its stamina drains, so investing in quality tack is a genuine performance upgrade rather than a purely cosmetic choice.
- Feed and groom your horse regularly to keep its cores and health up.
- Always carry horse reviver to save a downed mount before you lose it for good.
- Invest in good tack to improve stats and stamina efficiency.
- Commit to one horse and build its bond for the biggest overall gains.
It is worth building a small routine around horse care the same way you would around your roles. Keep reviver and horse food stocked before you set out, brush your horse when you pass through camp, and do not treat it as a disposable vehicle. A well-maintained, fully bonded mount quietly improves every other activity in the game, and losing a horse you have invested time into is a setback that a little habitual care easily prevents.
Acquiring and upgrading your mount
Knowing which horse you want is only useful if you know how to get it, and horses are acquired primarily through stables found in towns across the map. There you can browse the breeds currently on offer, compare their stat bars, and purchase a mount with cash or, for some premium horses, with gold. Because the specific breeds available and their prices can vary within the game, it is always worth checking a few stables and confirming the current options rather than relying on outdated assumptions. Take your time with the decision, since a horse is a purchase you will live with for a long while.
Once you own a horse, the stable is also where you equip and upgrade its tack, choosing saddles and equipment that improve its stat ratings and stamina efficiency. Budget for good tack as part of the cost of a horse rather than an afterthought, because the right equipment meaningfully improves performance on top of the breed's base stats. You can own more than one horse, which lets you keep, for example, a fast all-rounder for general play and a sturdier mount for hauling, swapping between them as your activities demand. Whatever you choose, remember that the horse you invest care and bonding into will always serve you better than a newer one you have not yet developed.
One habit that saves many players grief is keeping a reliable backup mount rather than depending entirely on a single prized horse. Even a well-cared-for horse can be killed in a bad encounter, and while reviver prevents most permanent losses, having a second capable horse stabled means a setback never leaves you stranded or forced to ride something unsuitable. Treat your main horse as your everyday partner and your backup as insurance, and you will rarely be caught out. It is a small bit of planning that pays off precisely when things go wrong, which in a shared, sometimes hostile world is more often than you might hope.
Do not overlook the simpler quality-of-life benefits a good horse brings, either. A mount with strong stamina lets you cross the map with fewer stops, a calm temperament keeps you steady when predators or players appear, and ample carrying capacity means fewer trips back to camp during role work. These advantages are easy to undervalue when you are staring at stat bars, but across hundreds of hours they add up to a far smoother experience. In a game built around long rides through a vast and often dangerous world, the horse beneath you quietly shapes almost everything you do, which is exactly why it deserves careful thought rather than an impulse purchase.
Matching your horse to how you play
The best horse is ultimately the one best suited to your actual activities, so your choice of mount should follow your choice of roles. If you spend your time hauling carcasses and running wagons, read our Red Dead Online Trader guide to understand the loads and distances your mount will be handling. And if you cover enormous distances gathering valuables across the map, our Collector guide makes clear why speed and endurance matter so much for that role. Pick a breed that fits your needs, bond with it properly, care for it consistently, and equip it with good tack, and your horse will quietly make every other part of Red Dead Online easier and more enjoyable.
Frequently Asked Questions
What is the best horse in Red Dead Online?
There is no single best horse for everyone, but balanced high-stat breeds, and the Arabian breeds in particular, have a strong reputation as excellent all-rounders. The right pick depends on your play style and should be verified at the stable.
Which stats matter most?
Health, stamina, speed, and acceleration are the core stats, along with temperament. For most players a balance of stamina and speed is ideal, while haulers may prefer strength-focused breeds.
How important is bonding?
Very. Raising your bond unlocks better handling, extra maneuvers, and improved performance. A well-bonded modest horse can outperform a neglected better one, so commit to one mount and build the bond.
Should I buy a horse with cash or gold?
Most horses can be purchased with cash, though some premium mounts may use gold. Save gold for roles where possible, and verify current prices and availability at the stable.
How do I keep my horse from dying permanently?
Keep it fed and healthy, and revive it quickly with horse reviver if it is downed in combat. Acting fast after your horse goes down prevents permanent loss.
Does tack actually improve performance?
Yes. Quality saddles and tack can improve stat ratings and reduce stamina drain, so they are a genuine performance upgrade rather than just a cosmetic choice.